


'%3e%3cpath%20d='M21.0949%203.79395L13.9961%209.82854H21.0949V3.79395Z'%20stroke='black'%20stroke-width='1.38'%20stroke-miterlimit='10'/%3e%3cpath%20d='M13.998%209.82854L7.44531%203.79395V9.82854H13.998Z'%20stroke='black'%20stroke-width='1.38'%20stroke-miterlimit='10'/%3e%3cpath%20d='M13.9961%202.69922V25.1919'%20stroke='black'%20stroke-width='1.38'%20stroke-miterlimit='10'/%3e%3cpath%20d='M20.5488%2016.4113L13.9961%209.82812V18.2217L20.5488%2024.0918V16.4113Z'%20stroke='black'%20stroke-width='1.38'%20stroke-miterlimit='10'/%3e%3cpath%20d='M7.44531%2016.4113L13.998%209.82812V18.0526L7.44531%2024.0918V16.4113Z'%20stroke='black'%20stroke-width='1.38'%20stroke-miterlimit='10'/%3e%3cpath%20d='M4.71094%209.82812V18.6057H7.44125V16.4113L13.9941%209.82812H4.71094Z'%20stroke='black'%20stroke-width='1.38'%20stroke-miterlimit='10'/%3e%3cpath%20d='M13.9961%209.82812L20.5488%2016.4113V18.6057H23.2792V9.82812H13.9961Z'%20stroke='black'%20stroke-width='1.38'%20stroke-miterlimit='10'/%3e%3c/g%3e%3c/svg%3e)

'%3e%3cmask%20id='mask0_21456_29260'%20style='mask-type:luminance'%20maskUnits='userSpaceOnUse'%20x='0'%20y='0'%20width='28'%20height='28'%3e%3cpath%20d='M27.5%200.5H0.5V27.5H27.5V0.5Z'%20fill='white'/%3e%3c/mask%3e%3cg%20mask='url(%23mask0_21456_29260)'%3e%3cpath%20d='M14%2027.5C13.4854%2024.1035%2011.8974%2020.9608%209.46828%2018.5317C7.03922%2016.1026%203.89651%2014.5146%200.5%2014C3.89651%2013.4854%207.03922%2011.8974%209.46828%209.46828C11.8974%207.03922%2013.4854%203.89651%2014%200.5C14.5147%203.89644%2016.1028%207.03905%2018.5318%209.46816C20.9609%2011.8972%2024.1035%2013.4853%2027.5%2014C24.1035%2014.5147%2020.9609%2016.1028%2018.5318%2018.5318C16.1028%2020.9609%2014.5147%2024.1035%2014%2027.5Z'%20fill='url(%23paint0_linear_21456_29260)'/%3e%3c/g%3e%3c/g%3e%3cdefs%3e%3clinearGradient%20id='paint0_linear_21456_29260'%20x1='9.5'%20y1='9.5'%20x2='20.75'%20y2='21.875'%20gradientUnits='userSpaceOnUse'%3e%3cstop%20stop-color='%23F0DCD6'/%3e%3cstop%20offset='0.914506'%20stop-color='%231D6DFF'/%3e%3c/linearGradient%3e%3cclipPath%20id='clip0_21456_29260'%3e%3crect%20width='28'%20height='28'%20fill='white'/%3e%3c/clipPath%3e%3c/defs%3e%3c/svg%3e)
'%3e%3cpath%20d='M22.8019%2011.2412L23.5234%2011.6807V12.0103L23.3172%2012.7796L14.5579%2014.9771L13.7344%2012.7951L22.8019%2011.2412Z'%20fill='%23D97757'/%3e%3cpath%20d='M19.5236%204.77832L20.5322%205.00396L20.8%205.35575L21.0552%206.19876L20.9494%206.73644L15.0712%2015.3068L13.1133%2013.2191L18.5338%205.63471L19.5236%204.77832Z'%20fill='%23D97757'/%3e%3cpath%20d='M14.4577%203.43951L15.0761%203L15.5912%203.21976L16.1065%203.9889L14.6949%2013.0345L13.7364%2012.3397L13.3242%2011.131L14.0456%204.31853L14.4577%203.43951Z'%20fill='%23D97757'/%3e%3cpath%20d='M7.84766%203.5851L8.48285%202.7199L8.89716%202.61914L9.71923%202.74717L10.125%203.08581L13.0815%2010.0748L14.1509%2013.3954L12.8997%2014.1372L8.13117%204.91019L7.84766%203.5851Z'%20fill='%23D97757'/%3e%3cpath%20d='M4.77232%208.38688L4.56641%207.50742L5.18478%206.73828L5.90613%206.84816H6.11223L10.4403%2010.2544L11.78%2011.3531L13.6349%2012.8914L12.6044%2014.7594L11.6769%2013.9903L11.0586%2013.331L5.08168%208.82593L4.77232%208.38688Z'%20fill='%23D97757'/%3e%3cpath%20d='M3.53288%2014.0982L3.06641%2013.5489L3.06647%2013.0601L3.53288%2012.8896L8.78833%2013.2193L13.9408%2013.6588L13.7736%2014.7528L3.94502%2014.2082L3.53288%2014.0982Z'%20fill='%23D97757'/%3e%3cpath%20d='M6.62378%2019.8178H5.59334L5.18359%2019.3146V18.7132L6.93299%2017.3946L14.045%2012.5674L14.7648%2013.8785L6.62378%2019.8178Z'%20fill='%23D97757'/%3e%3cpath%20d='M8.57739%2022.8884L8.16518%2022.9984L7.54688%2022.6687L7.64995%2022.1193L13.7299%2013.5488L14.5543%2014.7574L10.0201%2021.1305L8.57739%2022.8884Z'%20fill='%23D97757'/%3e%3cpath%20d='M13.7361%2023.9861L13.4271%2024.4257L12.8088%2024.6454L12.2935%2024.2058L11.9844%2023.5466L13.5301%2014.6465L14.4576%2014.7563L13.7361%2023.9861Z'%20fill='%23D97757'/%3e%3cpath%20d='M18.9869%2021.5713V22.4503L18.8838%2022.7799L18.4716%2022.9997L17.7503%2022.8974L12.7969%2015.0367L14.7617%2013.4404L16.4104%2016.6269L16.5652%2017.7805L18.9869%2021.5713Z'%20fill='%23D97757'/%3e%3cpath%20d='M21.3629%2020.2507L21.4659%2020.8L21.1568%2021.2396L20.8476%2021.1297L19.0958%2019.8112L16.4165%2017.284L14.3555%2015.7457L14.9736%2013.6582L16.0041%2014.3175L16.6226%2015.5259L21.3629%2020.2507Z'%20fill='%23D97757'/%3e%3cpath%20d='M20.0232%2014.6482L22.5995%2014.8679L23.2178%2015.3074L23.6299%2015.9667V16.441L22.4964%2016.9556L16.7256%2015.4173L14.3555%2015.3074L14.9737%2013L16.6226%2014.3185L20.0232%2014.6482Z'%20fill='%23D97757'/%3e%3c/g%3e%3c/svg%3e)
Mac voice-to-text is a powerful tool that can boost productivity by enabling faster content creation. It is also helpful when you want to give your hands a break from typing. Whether you are a student, writer, or a professional, this feature can help you type faster, saving you time and effort.
In this guide, we’ll walk through what Mac voice-to-text is, why it matters, who should use it, how it works, and how to do it.
What Is Mac Voice to Text?

Mac voice-to-text is a feature that lets the device recognize your speech and convert it into text. There are two primary tools that you can use:
- Dictation
Dictation is a voice-to-text feature that supports voice typing. Your spoken words will be converted into text. It also supports multiple languages, punctuations, commands, and emojis.
On-device dictation is available on Apple Silicon (M1/M2/M3/M4) Macs and newer Intel-based Macs. This ensures privacy as your audio is not sent to Apple servers.
- Voice Control
Voice control lets you navigate and control your Mac by voice, such as opening apps, scrolling, clicking buttons, and dictating text.
Mac Dictation vs. Siri: What’s the Difference?
Mac Dictation
Mac Dictation is a tool that turns spoken words into text, such as in Notes, emails, messages, and more.
How it works:
When Dictation is activated, the Mac listens to spoken words and converts them to text. Dictation focuses on text input, not general commands.
Siri
Siri is like a virtual assistant that responds to voice commands. It can answer questions, get weather updates, search the web, launch apps, and more.
How it works:
Say “Hey Siri” or press a Siri hotkey. It will interpret your voice and then perform tasks or provide information based on voice commands.
Key Differences:
Feature | Mac Dictation | Siri |
Main function | Convert speech into typed text | Performs tasks/answers questions |
Use Case | Writing emails, notes, and documents. | Companion assistant (weather, searches) |
Activation | Keyboard Shortcut / Menu | Voice Cue (Hey Siri), menu icon, or shortcut |
Interaction Style | Continous dictation | Conversational Q&A and commands |
Why Use Voice to Text on Mac?
Voice-to-text is one of the convenient features that can improve your workflow. Here are some reasons why you can benefit from using this feature:
- Faster Than Typing
You can type faster with your voice than you can with your keyboard. It can help you easily type notes, messages, emails, docs, and other files.
- Great For Accessibility
Typing will be easier, especially if you want to give your hands a break or have a hands-free experience. This is also helpful to people with temporary injuries and mobility limitations.
- Help Content Creators
Content creators can benefit from voice-to-text, as it helps them speed up the creation process, generate drafts more quickly, write outlines, and improve accessibility workflows.
- Perfect For Multitasking
You can dictate notes while doing other things, such as walking around and talking through ideas hands-free.
- Better Focus and Creativity
When you speak your ideas out loud, the text will sound more natural, as if you were just talking to a friend. It also helps brainstorm ideas faster, reduce writer's block, and produce drafts faster.
Who Should Use Mac Voice-to-Text?
Mac voice-to-text is beneficial for many people, as it can be used for various purposes, especially to improve workflow and productivity.
1. Content Creators
With Mac's Voice-to-Text, content creators can easily create outlines, captions, summaries, and other files.
2. Video Localization Teams
Those who localize video for global reach will also benefit from this feature, as it can help them draft captions, generate rough transcriptions, speed up translation preparation, improve workflow, and finish tasks more efficiently.
3. Students & Educators
Creating written activities and other tasks will be made faster. Students and educators can dictate essays, lecture notes, research summaries, class presentations, and other school projects.
4. Remote Workers
Remote workers can send emails, write messages, take meeting notes, and more without touching the keyboard.
5. Users with Physical Limitations
This is a helpful tool for users with physical limitations, as it will not hinder them from doing things. Typing and creating files will be more accessible to them.
6. Multilingual Users and Other Individuals
macOS also supports various languages for dictation, making it perfect for multilingual users. This can help people work faster, more conveniently, and more comfortably. It is also perfect for individuals from different walks of life who want to type faster.
How Mac Voice to Text Helps Productivity
Mac voice-to-text helps improve productivity so you can work faster, save more time, and get more done.
- Writing Faster Without Typing
With Mac voice-to-text, you can write faster, as speaking may be more convenient, allowing ideas to flow more naturally.
- Getting Ideas Out Instantly
You can easily dictate the ideas that come into your mind so that you won’t miss them. It can help capture ideas and turn them into text instantly, without worrying about spelling or other details.
- Helps Focus on Thinking, Rather Than Typing
If you are more focused on thinking, ideas will flow naturally, and you can focus more on ideas, content, and creativity.
- Useful for Multitasking
This tool is ideal for those who want hands-free input, allowing them to type while doing other things, such as organizing or reviewing documents.
- Creating Quick Drafts
Drafts can be created quickly so that you can save time. When you already have drafts, editing and polishing them will be easier.
How to Use Mac Voice to Text
Here is a simple guide on how to use Mac Voice to Text (Dictation)
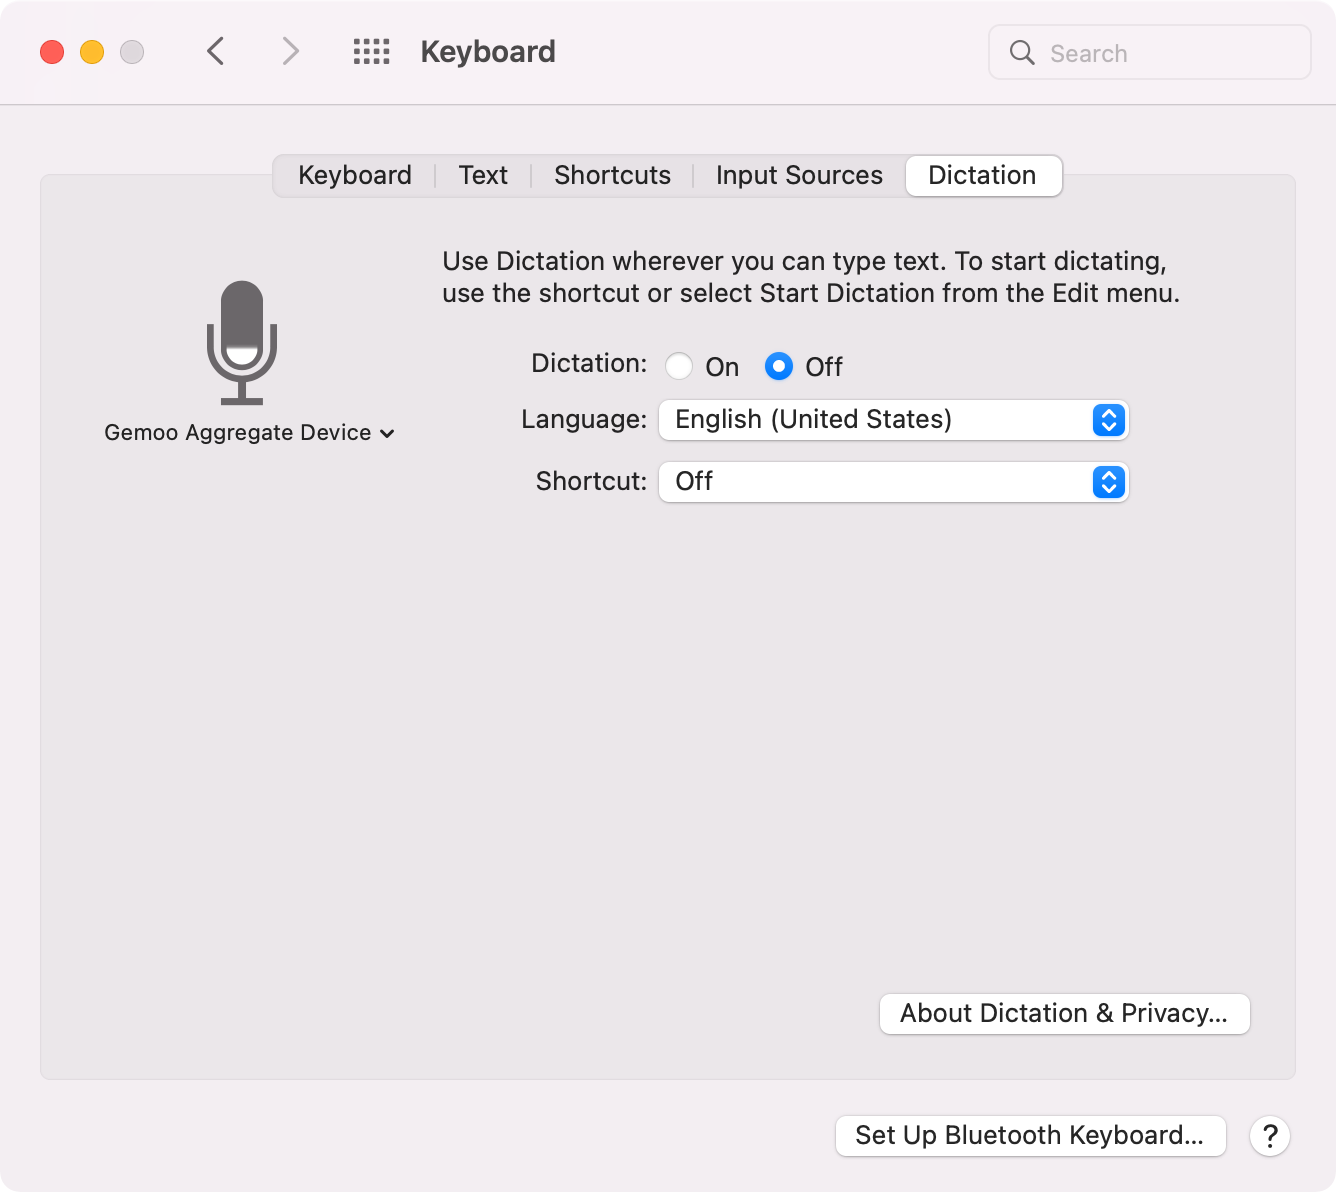
Step 1: Enable Dictation in System Settings
To start using your voice instead of typing, you first need to activate the feature:
- Open the Apple Menu: Choose System Settings (Note: "System Preferences" is for older macOS versions).
- Navigate to Keyboard: Click Keyboard in the left sidebar.
- Toggle Dictation: Scroll down to the Dictation section and toggle it to On.
- Confirm Activation: Click Enable when prompted.
- Set Your Privacy Preference: Choose "Share Audio Recordings" to help improve Apple’s AI, or "Not Now" to keep all processing strictly on-device (recommended for maximum privacy).
Step 2: Start Your First Voice-to-Text Session
- Select Your Target Field: Place your cursor in any text field (Word, Email, Notes, etc.).
- Trigger Dictation: * The Quickest Way: Press the Microphone (F5) key on modern Mac keyboards.
- Alternative: Use your custom shortcut (the default is often double-pressing the Fn or Ctrl key), or go to Edit > Start Dictation.
- Wait for the Signal: Look for a glowing microphone icon near your cursor or hear a quick chime—this means your Mac is listening.
- Speak Naturally: In macOS Sequoia and Tahoe, you can now type and talk at the same time. The microphone won't turn off if you manually fix a typo mid-sentence.
Step 3: Use Advanced Commands & Auto-Punctuation
Maximize your productivity by letting Apple Intelligence handle the formatting:
- Auto-Punctuation: By default, your Mac automatically adds commas, periods, and question marks based on your pauses. (To toggle this, go to Keyboard > Dictation > Auto-punctuation).
- Voice Commands:
- Punctuation: Say "Exclamation mark," "Question mark," or "Question mark emoji."
- Formatting: Say "New line" for a break or "New paragraph" to start fresh.
- Emojis: On Apple Silicon Macs, just say "Heart emoji" or "Fire emoji" to insert them instantly.
- Multi-Language Switching: If you've enabled multiple languages, click the language name in the dictation window to switch
How To Set The Dictation Keyboard Shortcut
You can pick a dictation shortcut or make your own.
- Choose Apple Menu
- Go to Systems Settings
- Click Keyboard
- Go to Dictation
- Click the pop-up menu next to Shortcut
- Choose a shortcut to start dictation
Customizing a shortcut that is not on the list:
- Choose Customize.
- Press the keys you want to use.
When you pick a Dictation shortcut, depending on your Mac model, your Mac may automatically update the Keyboard settings.
In newer versions (Sequoia/Tahoe), the default shortcut may no longer be double-clicking Ctrl. Check your current shortcut in System Settings > Keyboard, as it may vary by model.
The steps are almost the same across different macOS versions, though there may be slight differences depending on your Mac model. For specific instructions, tips, and additional details, you can follow the official guides for Tahoe 26, Sequoia 15, Sonoma 14, Ventura 13, Monterey 12, Big Sur 11.0, Catalina 10.15, Mojave 10.14, and High Sierra. In macOS 26 Tahoe, Apple Intelligence integration has significantly improved dictation accuracy.
Be More Productive in Video Localization and Content Creation with VMEG AI
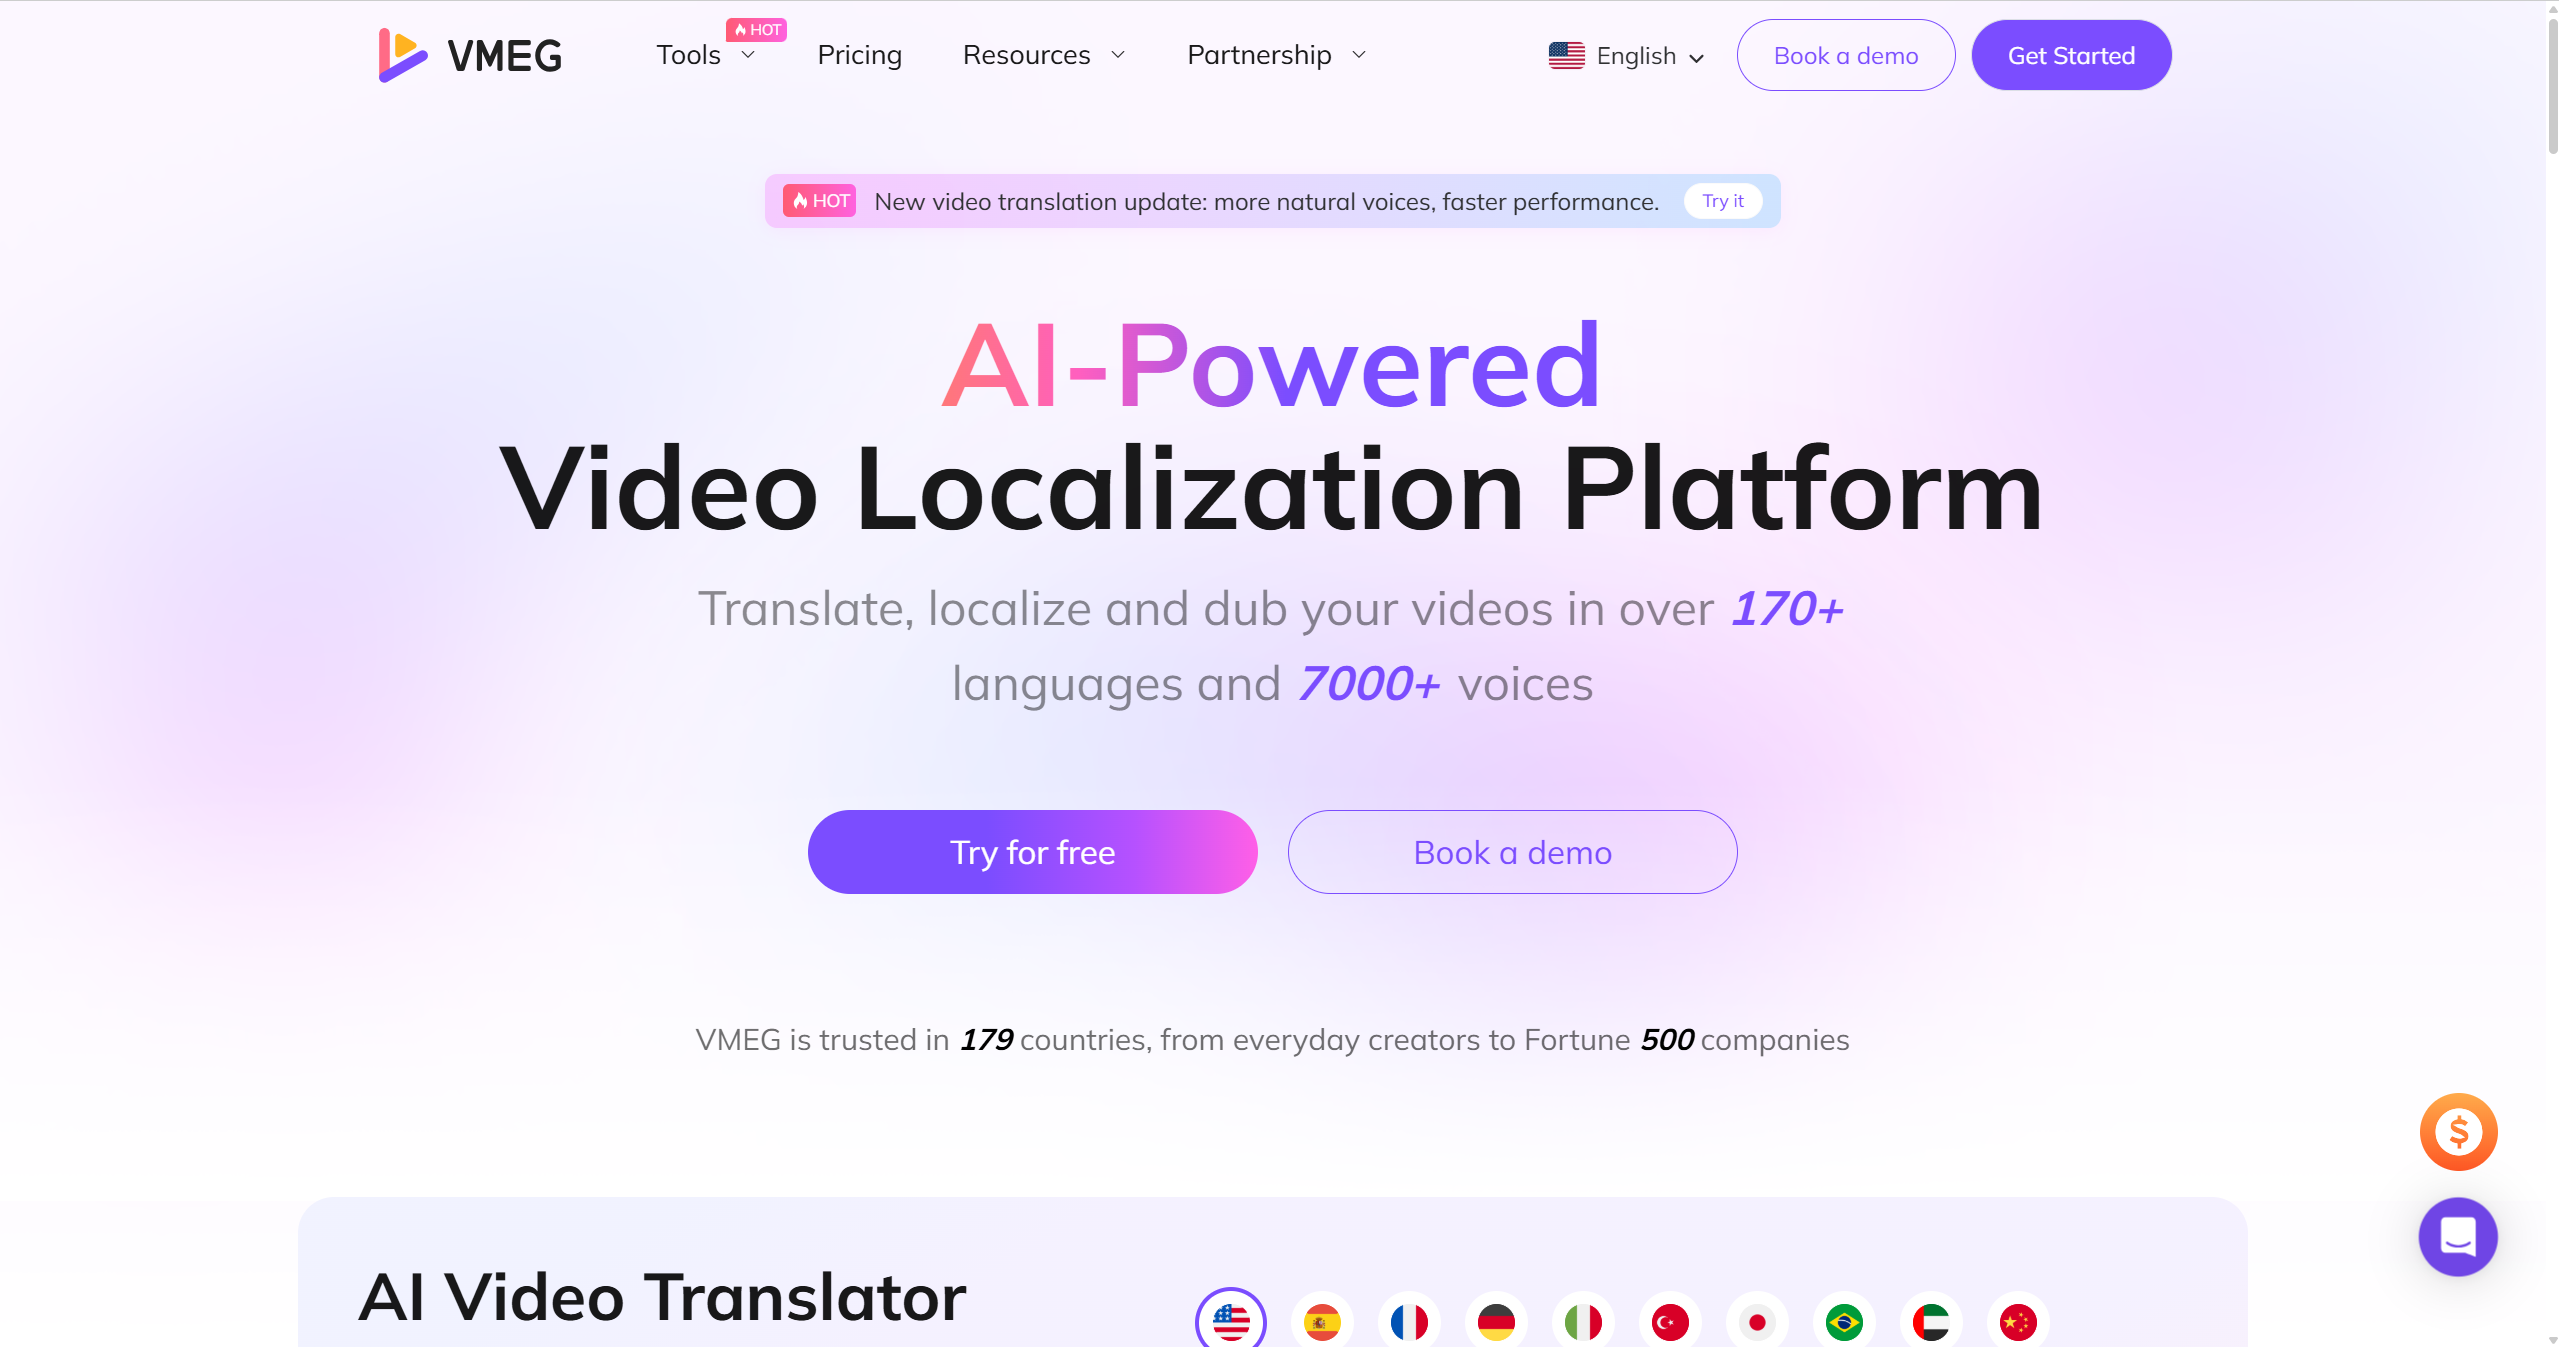
If you are looking for another way to translate audio to text or a software that handles it smoothly, try vmeg.ai. It is a perfect tool if you want to record an audio first, then transcribe it. VMEG supports multiple file formats, such as MP4, MOV, WEBM, MP3, WAV, and more. It also supports YouTube links, making it easier to transcribe your videos for content repurposing and other purposes. It supports more than 170 languages and accents, making it ideal for transcribing messages, meetings, and more.
Aside from audio-to-text, it also offers tools for Translation, Subtitles, Transcription, and text-to-speech, making it a good all-in-one platform that you can rely on for video localization and other projects.
Why Use VMEG AI for Video Localization and Content Creation?
- Supports more than 170 languages and 7000 lifelike voices. Localizing your content will be easier and more convenient, as it supports multiple languages, helping your content resonate with a global audience.
- Easy-to-use. You do not need technical expertise, as it is easy to use.
- Numerous Tools. It provides tools for translation, subtitles, transcription, text-to-speech, and more.
- One Tool To Handle All Your Localization Needs. It offers Multi-Speaker Detector, Upload SRT File, Advanced Editing Suite, OCR Subtitle Extractor, Precise Translation, and Tone & Emotion Cloning, making it ideal for a wide range of projects.
Conclusion
Mac voice-to-text is one of the most powerful features of macOS, helping users be more productive. Whether you want to create content faster, enhance productivity, or multitask, you can easily use the dictation feature of Mac. And if you prefer to record first before transcribing, or if you have an audio file you want transcribed, use VMEG AI for transcription and localization. These tools will help you do more things in less time and create content that resonates with a global audience.
The VMEG Team
Behind VMEG stands a passionate team of creatives, engineers, and language lovers. At the crossroads of AI and storytelling, they craft tools that bridge languages and cultures.