
Video Translation

Video Translation
- How to Translate a Video
- How to Add Lip Sync to Translated Videos
- What Languages Do You Support?
Getting Started
Payment & Billing
Voice Cloning
Ask Questions
Subtitles
Transcription
Text to Speech
Audio Translation
How to Translate a Video
In this guide, we'll show you how to translate a video using VMEG.
Submit Your Video Translation Task
- Upload Your VideoGo to VMEG Video Translator and upload a video from your device. Once uploaded, you’ll be prompted to set your dubbing preferences.Note: For the best translation quality, make sure your video has clear, audible speech and minimal background noise. Please note that song translation is not currently supported.
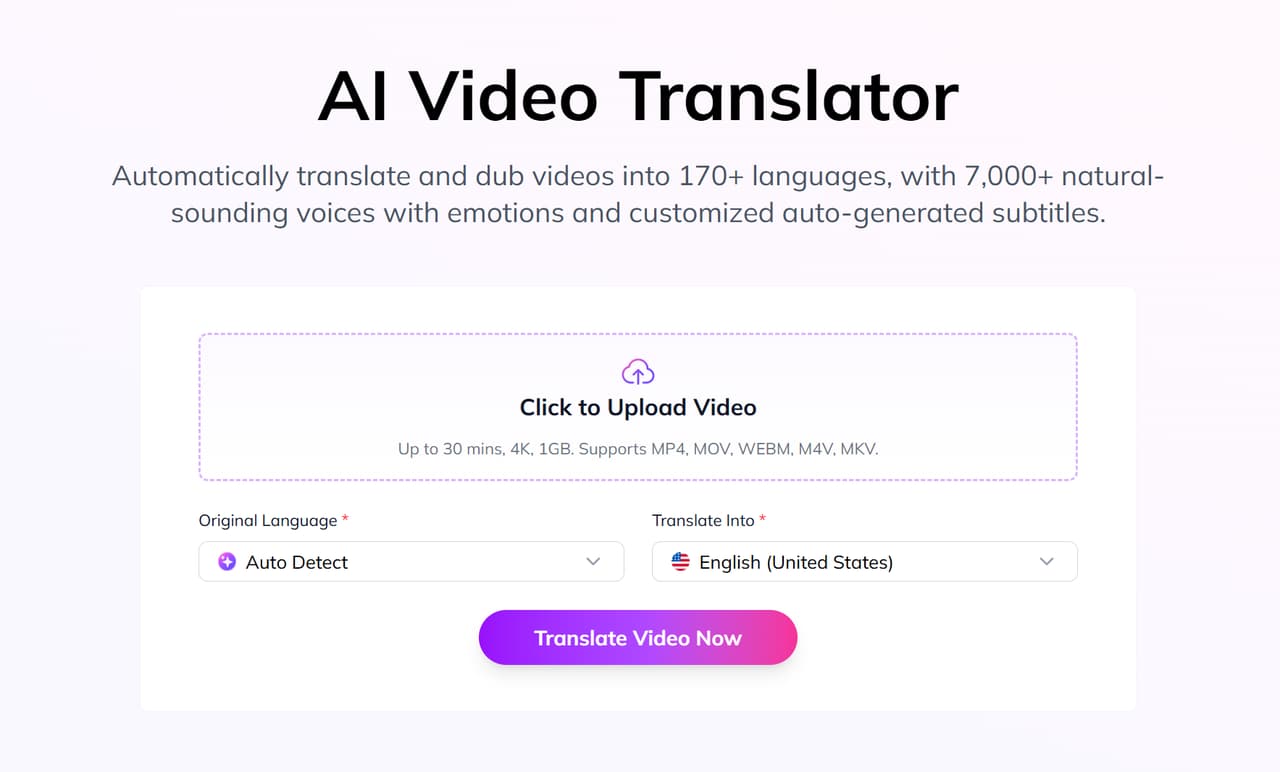
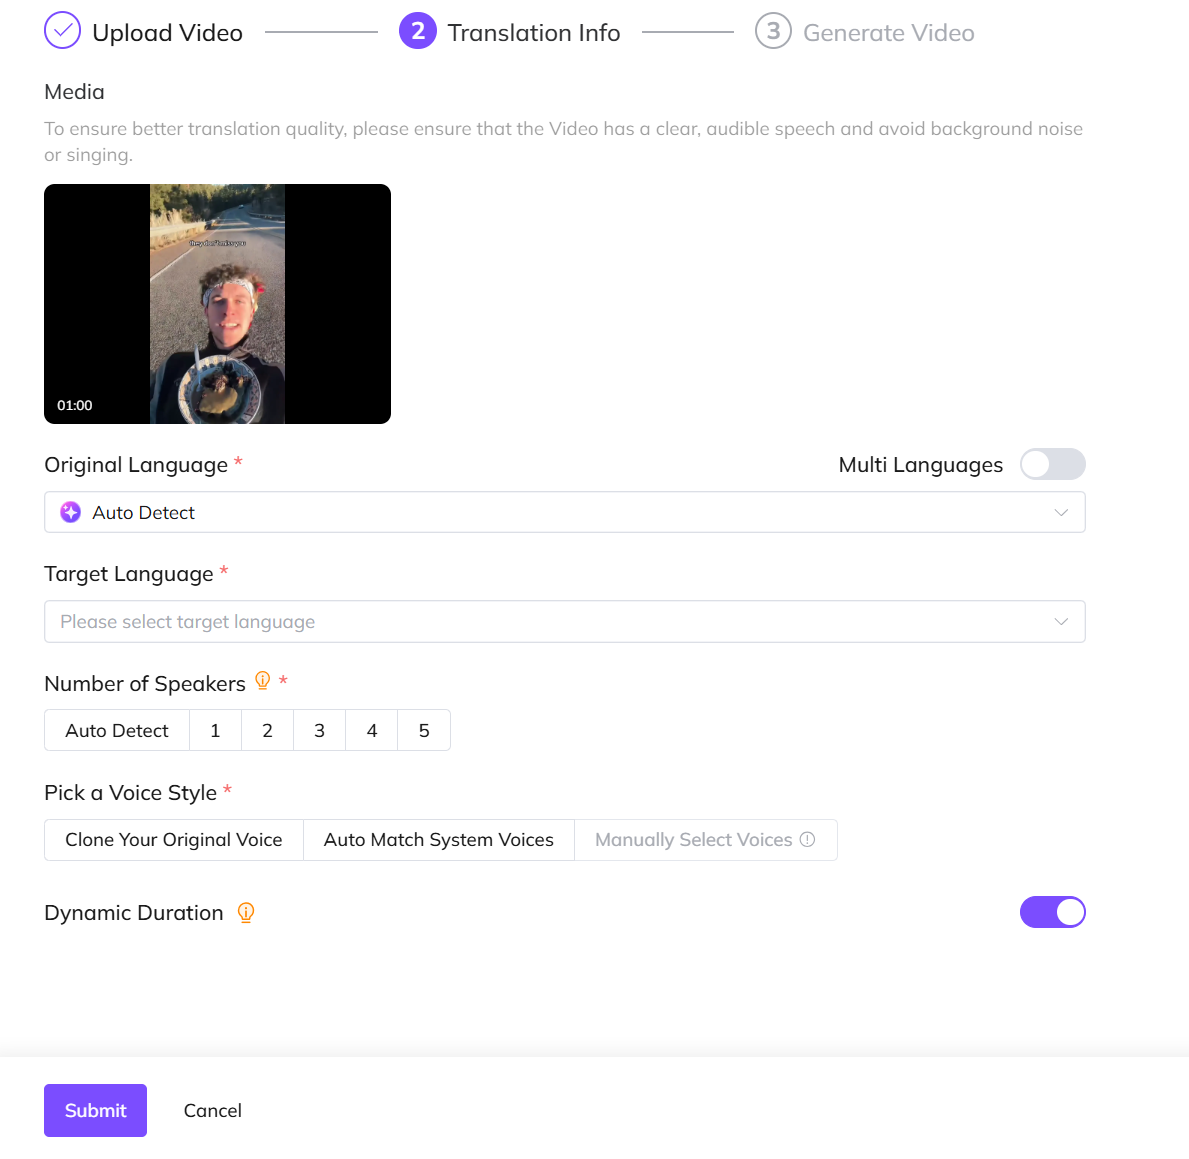
- Set Language PreferencesChoose the original language, or let the tool auto-detect it. If your video contains more than one language, enable Multi Languages to help the system identify each one accurately.Select your Target Language and indicate the number of speakers. This helps us detect and differentiate each voice correctly.
- Pick a Voice StyleLastly, set your voice preference. You have three options:• Clone Original Voice: Preserve the voice from your original video and apply it to the translated version.• Auto-Match System Voice: Let VMEG search our library of 7,000+ natural voices and automatically select the one(s) that best match your video.• Manually Select Voice: Browse the voice options yourself, listen to samples, and choose your preferred voice.Don’t worry. You can still change the voice later in the editor after submitting the task.
- Enable Dynamic DurationDynamic Duration is a feature that intelligently adjusts the timing of the translated audio to better match the natural rhythm and flow of the target language.This helps ensure smoother, more natural-sounding speech, especially when translating between languages with different sentence lengths or speaking speeds.This option is enabled by default. If you choose to disable it, the translated voice will follow a strict, one-to-one timing match with the original video.This means every sentence will align exactly with the original timestamps, which may sound less natural in some languages.
Ready to get started?
Check out the walkthrough below and submit your first video for translation.
Edit Your Translation Task
Once translation is complete, click the translated project in My Tasks to begin editing the generated dub. You’ll find a wide range of tools are available for editing both translation and voiceover.
- Edit Script & RedubTo edit the translated text or audio, you have two options:• Modify the original script and click Retranslate to generate a new dub.• Or directly edit the translated script.• After making any changes, you’ll see a prompt: “You've edited the script. Apply the changes to re-dub and see the updated preview.” Click the Apply Changes button below the video to redub and preview the updated result.
- Adjust VoiceClick Edit Speaker to enter Speaker Management mode. Here you can change the voice used in the translated video.You can also adjust the voice’s emotion and volume. Choose whether to keep the background audio.
- Adjust TimelineFine-tune the pace by dragging the timing blocks on the timeline:• Lengthen a block to slow down speech.• Shorten it to speed it up.You can also:• Adjust the start time of each sentence to better match the visuals.• Add or remove speech segments for a more customized result with real-time previews as you go.
- Add SubtitlesClick Add Subtitles, choose a subtitle template, and then click Select to apply it to your video. You can adjust the subtitle size, style, and position in real time using the preview window.
- Export & DownloadOnce everything is ready, you can download the translated video (.mp4) and both the translated and original subtitles (.srt).
Check out the walkthrough below to learn how to edit your translation task. Explore the powerful features of the editor in detail through the step-by-step guide.
Credits Usage by Video Translation
VMEG’s pricing uses a credit system, charging by the minute for video translations. Videos shorter than one minute are charged as one full minute.
- Basic translation costs 60 credits per minute.
- Adding lip sync costs 30 extra credits per minute.
- A 1-minute video costs 60 credits for translation. With lip sync, the total is 90 credits.
- For a 3-minute video, the translation costs 180 credits (3 minutes × 60 credits per minute). Adding lip sync brings the total to 270 credits.